Stop Ringing Out the Room - Busting Myths About Live Sound EQ
Stop using EQ in the wrong place for the wrong job!
It’s time to bust some myths about where you should use which type of EQ. We'll cover it all, from channel EQ, room EQ, system EQ, and even where you should notch out that ringing feedback. Because when you're trying to make your church sound the best, it matters.
Hey, if you're new here. My name is James and I help church sound techs save the day by eliminating audio distractions at church. If you're passionate about making church sound great so people can focus on Jesus, check out my Youtube channel or other blog posts HERE and HERE.
Stop Using Graphic EQ on Your Mains to Ring Out Feedback
So let's talk about this phrase “ringing out the room.” I get it. The vocal mics are likely to feedback through your speaker system, so it might make sense that you push up your vocal mic and then use a 31-band graphic EQ to notch out those frequencies from your main speakers. But what about the other sound sources that need those particular frequencies? Do they have to suffer just because the vocal mic can't handle it? What about the electric guitar? Is it going to feedback? What about the electronic keyboard? Does it have to suffer because the wiggling electrons going down that cable can’t feedback?
Obviously not. We don't have to use EQ on our overall mix to get rid of feedback. And I understand, in the days of simple sound boards and limited EQ, you had to do what you had to do. But now there's a more excellent way. You use each type of EQ, channel EQ, system EQ, room EQ, to do its own job. And you avoid graphic EQ like the plague. If your source (acoustic guitar, keyboard, etc.) has an EQ on it, you use that EQ to get it sounding as good as possible. If your instrumentalist doesn't know how to make their instrument sound good, tell them to leave all of those alone and let the sound person take care of it. But you can eliminate a lot of problems by making it sound great right at the source. Then at the sound board, you use the channel EQ to make that channel sound good. If you're using an unfamiliar or unreliable sound system, a pair of reference headphones can be really helpful for this so that you know that the channel sounds good right at the board. Then you can worry about the other EQs taking care of their job.
Now, on your console, there might be an EQ on your stereo bus and I very, very rarely will use this EQ. The EQ on your stereo bus can be used in a pinch, but it's not my favorite place to use EQ to fix other problems, and I'll tell you about that in just a second.
Next, we have system EQ and room EQ. The system in EQ is meant to make all the speakers sound good together. So if one speaker needs to be sent a little brighter signal to match the others, or if you need a front fill to match the tone of the main speakers, this is where your system EQ can come into play.
The room EQ is better suited for times when you're moving the same sound system into different rooms, like when you're on a tour. But most church sound systems are either set up every time in the same room or they're installed. So a lot of times we will take care of the room EQ and the system EQ at the same time.
Order of Operations
So let's talk about order of operations for how we learn to apply EQ so that we can get the best result out of our total sound system. We want to start at the end and then move our way back to the beginning. Starting with the system EQ, you’re trying to get each speaker to sound good in the room. Our goal is for it to be transparent. What goes into it is what comes out of it.
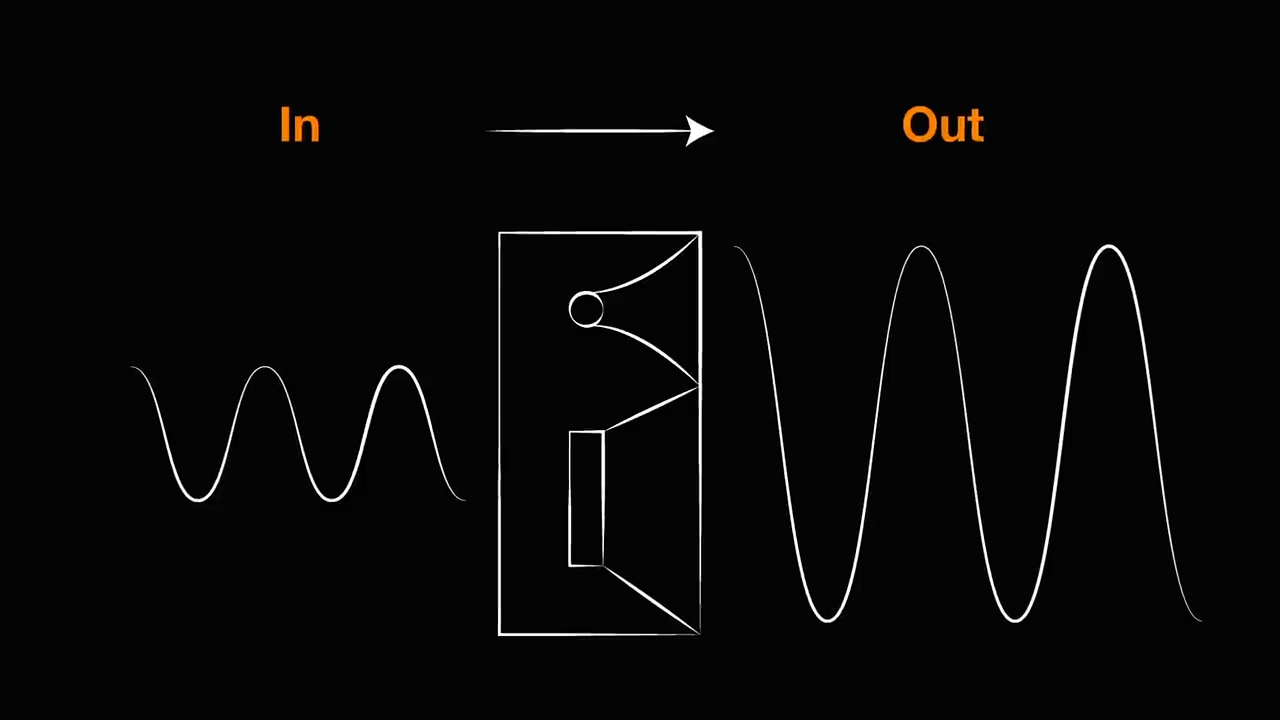
We're not trying to adjust our system EQ so that a vocal mic without EQ sounds good through it. Because which mic do you choose and which singer do you make sound good? And what if the proximity effect changes? And what part of their vocal range are you going to EQ it for? When they're singing really loud and high? Or when they're singing really low and dark?
Now one place where we're not aiming for exact transparency is on the bottom end. We like to push up a lot more low end with our subs in live sound because people absorb it and…well, we like to party.
To verify that what we're getting out of our sound system is what we're putting into it, there are two basic ways. You can play music through your system that you know really well, or have a pair of reference headphones and do the comparison where you're listening to the headphones, you're listening to the speakers, and you make EQ adjustments that way by ear. Or you can use a program with a microphone that uses a Fast Fourier Transform or FFT to compare the signal that's going out of the speakers to the signal that's being received at the microphone. Of course, there's a lot more that we can do with these programs. Like figuring out where our coverage drops off from the front and the back, side to side, and to see if there are any frequencies that jump out that we don't rely on our ears as much as we can see the little bump on a screen.
Now, I would encourage you as much time as you put into learning Smaart and learning how to use it and make the graphs look great, also work on your ear training to make sure that you can do this by ear. I've walked into so many churches where it's technically correct, but it sounds horrible. I don't understand it, I don't know where they went wrong, but it just doesn't sound good when you play music through it. And that's the whole goal. We want it to sound good when we play music through it.
When you're applying these EQ changes, remember to take little baby steps and A-B test it as you go. You want to make things better across the entire listening area, not just in one spot. So you've got to listen in other places to make sure that what you're fixing over in one area doesn't create another problem in a different area.
Now we're backing up to the stereo bus EQ. I only use this when I'm in the middle of a mix and I'm in a pinch. I show you how I use it in a video HERE, but the short story is that I set my real-time analyzer to be a slow averaging. This way I can see any peaks or bumps that might not have been happening during soundcheck when the room was empty.
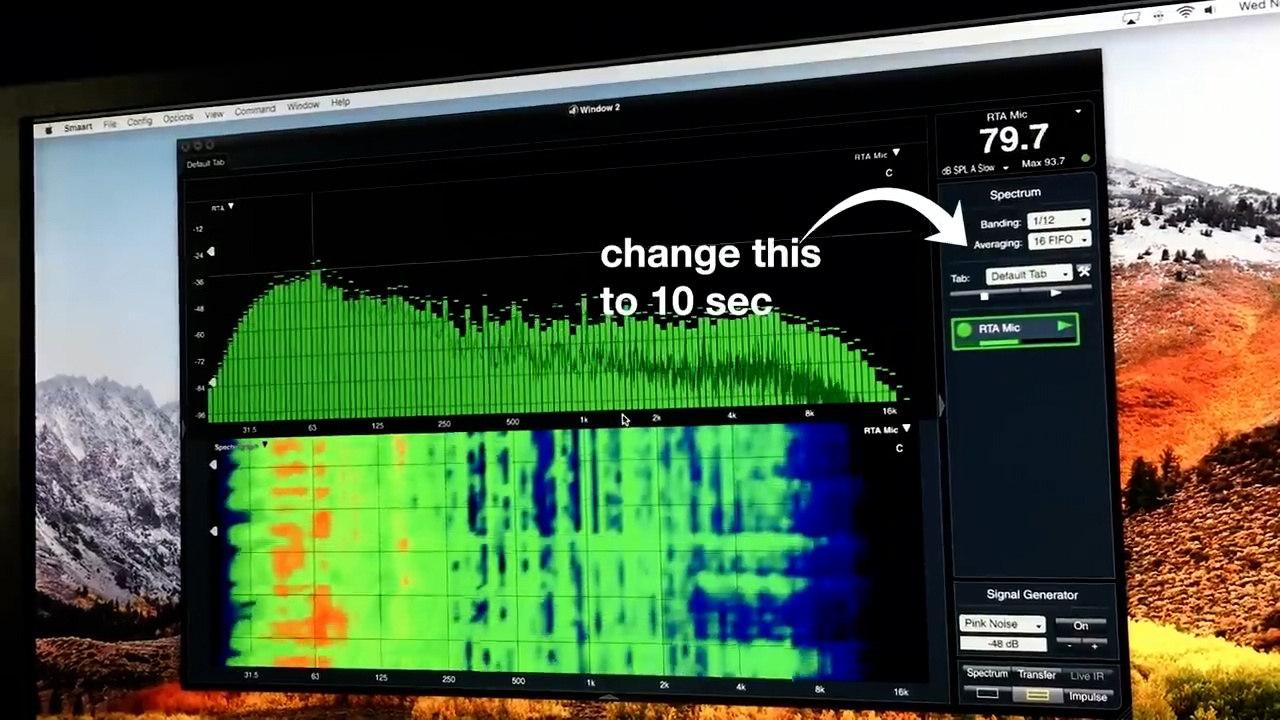
Then I might take a little bit of surgical EQ and take a little dip of 2 or 3 dB from the stereo bus because it's easy to reach for. It also could be that a bunch of my inputs sound fine by themselves, but when they combine, they might build up in a certain spot. So instead of going to each individual channel EQ and pulling out a little bit around, say, 500 Hz, I can just do it on my stereo bus and that'll take care of the problem quickly. So if you've got your room EQ right, you're channel EQ gets a whole lot easier. That way if it sounds good at the source and it sounds good when you push up the fader, things are good and you don't have to work too hard. This also helps a lot when you're mixing the live stream and front of house from the same console with the same inputs.
A Quick Dive Into the Nerdzone
Alright, we’re about to get into deep nerd territory, so hang on or just jump to the next section of this post to avoid it altogether. When we're talking about room EQ, we also have to think about acoustics. Because it's not just the speaker in an anechoic chamber that has no reflections going on affecting the way that it sounds.
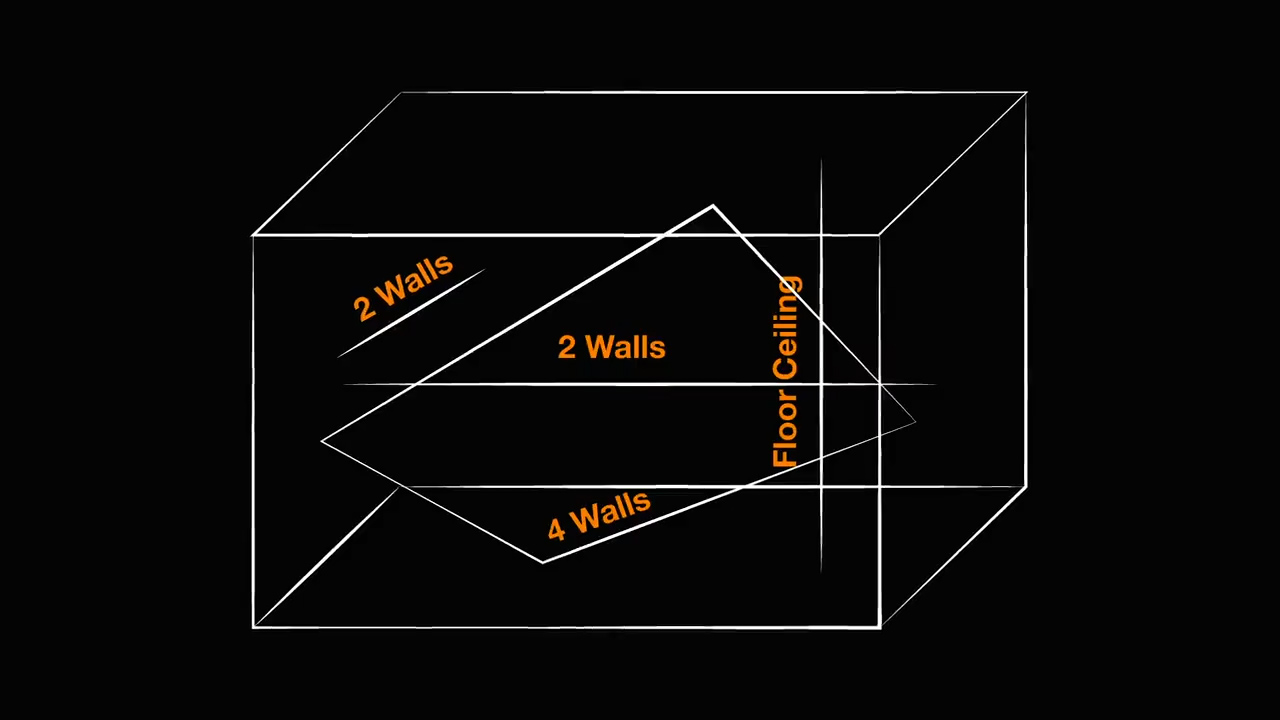
Your room is basically a big resonant chamber that will resonate at different frequencies based on the wavelength of that sound wave. The distance between two walls and four walls and the walls on the ceiling and the floor, all of those combine to make certain room modes that will resonate longer in your space. So even if the output from your speaker is perfectly linear, the room will cause certain frequencies to hang on longer, which gives them the impression of being higher intensity.
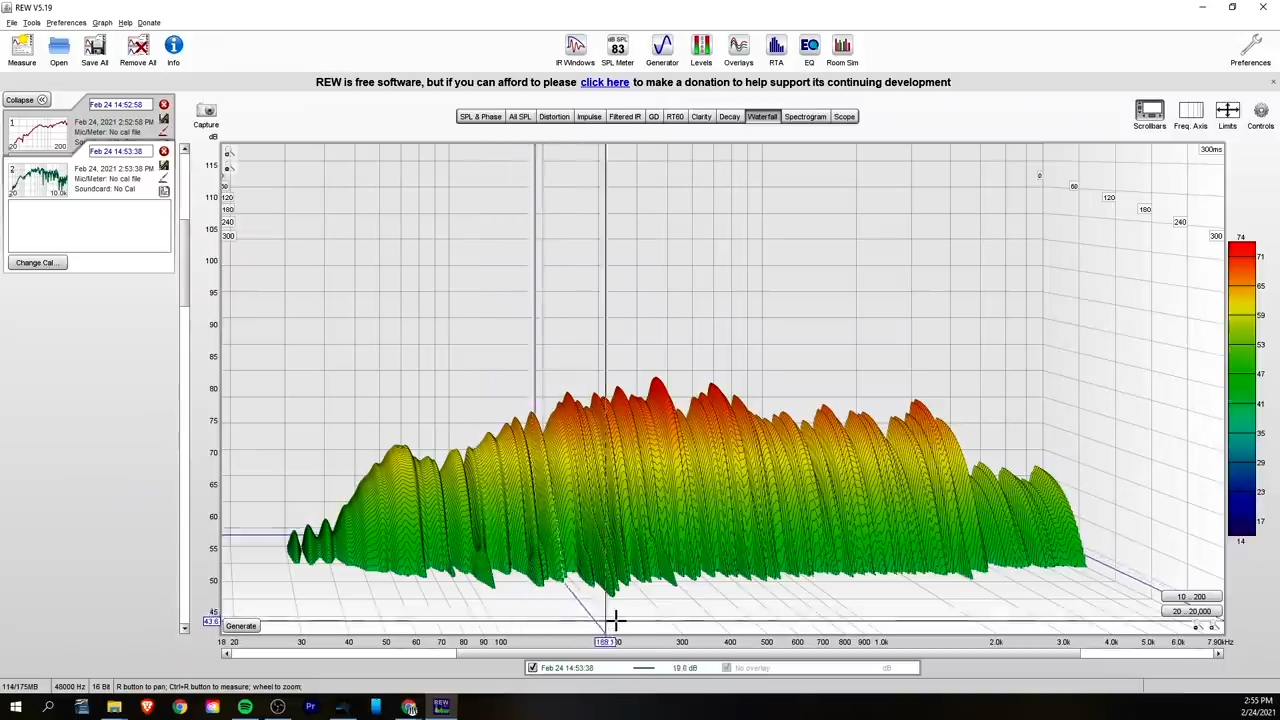
Now, aside from adding acoustic treatment and dampening and doing specific things to treat those frequencies, what we can do is reduce the intensity from the speaker system at those frequencies. So by exciting those frequencies less, we create fewer problems from the acoustics. Your room acoustics and the resonances happen at a wavelength, and that wavelength’s frequency is determined by the velocity of sound. Because temperature and humidity change when the seasons change, your room's tone could change as well. So the frequencies that you ducked before might not be working right now.
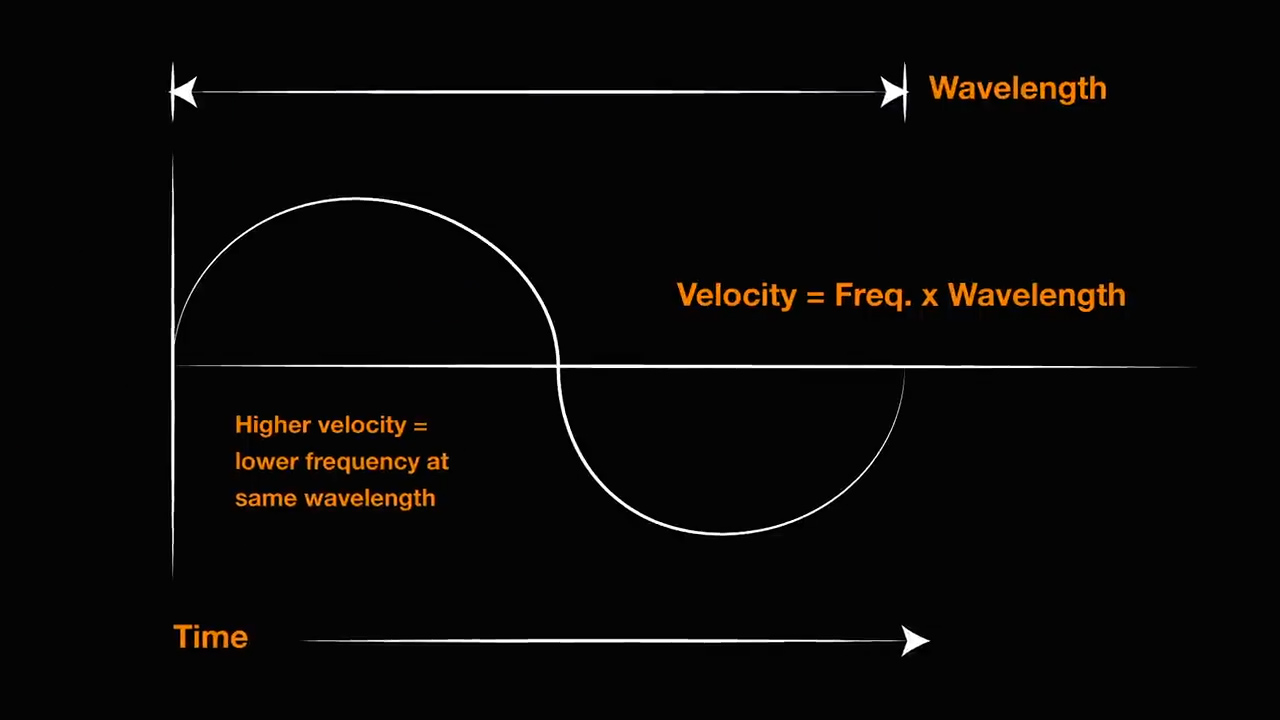
At the International House of Prayer in Kansas City, their global prayer room runs sound 24 hours a day, seven days a week, 365 days a year. We do shut-down for maintenance from time to time and move it someplace else. But in all honesty, there are techs that mix 2-hour long worship sets in there six times a week. So when you're in there every day and you know that the temperature changed, sometimes all the EQs that you used before don't feel right anymore. And I believe that it's because of this temperature and humidity change affecting the frequency that the wavelengths are operating to make those room resonances. Okay, nerd time’s over, we can get back to normal life now.
Eliminating Feedback While Preserving Fidelity
Now, again, I want to remind you that any time you do an EQ change, that's a global change on whatever you're affecting. So if you have an EQ on one speaker, that affects the level across the entire area where that speaker reaches. Not just on-axis, off-axis as well. In the same way, if you put an EQ on your stereo bus, it's going to do it for every single speaker in your room. And in that instance, it might make more sense to put it there if you're treating an acoustic anomaly.
Alright, now we're all the way back to the ringing out the room myth and feedback. The way we want to approach getting rid of feedback is to use the least severe means necessary so that we preserve the most fidelity. Now, I did make another post on how to get rid of feedback, you can check that right HERE. But if you tried all those things and they still didn't work, we want to add EQ to our channels where they're feeding back.
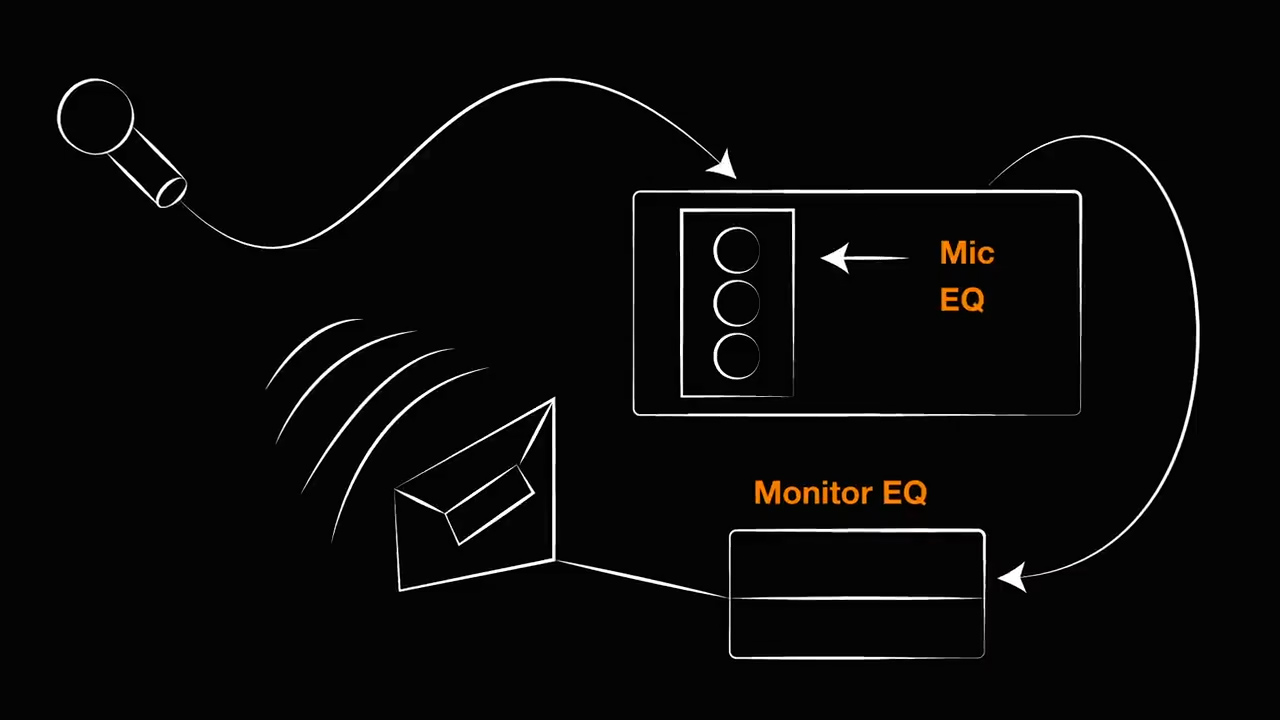
So if you have a monitor wedge and the vocal mic is feeding back through that wedge, you want to EQ that vocal mic that's going to the monitor wedge. Either on the wedge itself or on the vocal mic. If you've got the same vocal mic going to multiple wedges around the stage, cutting that feedback frequency on the mic's input channel going to those monitors is going to make it effective in every single one of those monitors.
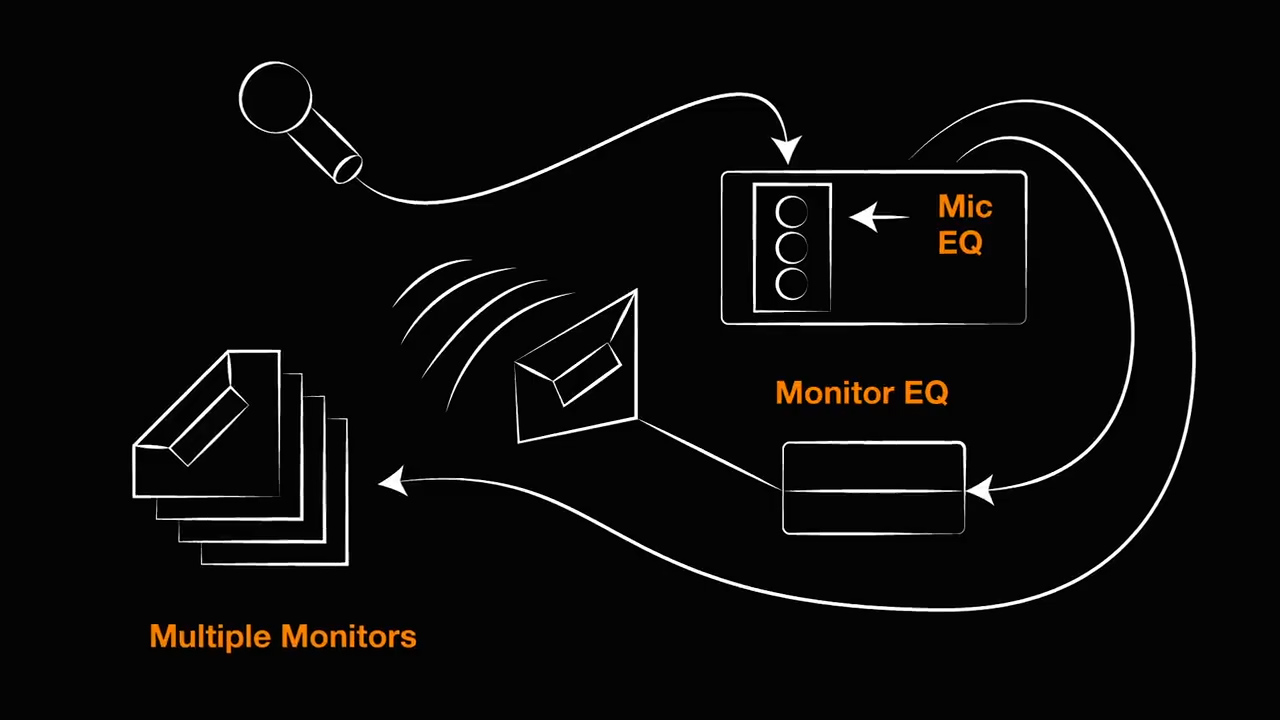
Of course, that's one reason why it's helpful to have a separate monitor console with its own EQ going to the monitors rather than running monitors from front of house.
But a lot of you are using in-ear monitors, so that might not be an issue for you. If you have feedback coming from the front of house speakers, you'll want to notch out that feedback again on the channel EQ because you don't want to get rid of that frequency for every other instrument, just that vocal channel. When you're cutting out feedback, try to get your bandwidth as narrow as you can to avoid affecting the frequencies on either side of that frequency that's feeding back. This will preserve the most natural sound, and your ear can tolerate really narrow, deep cuts without it feeling unnatural.
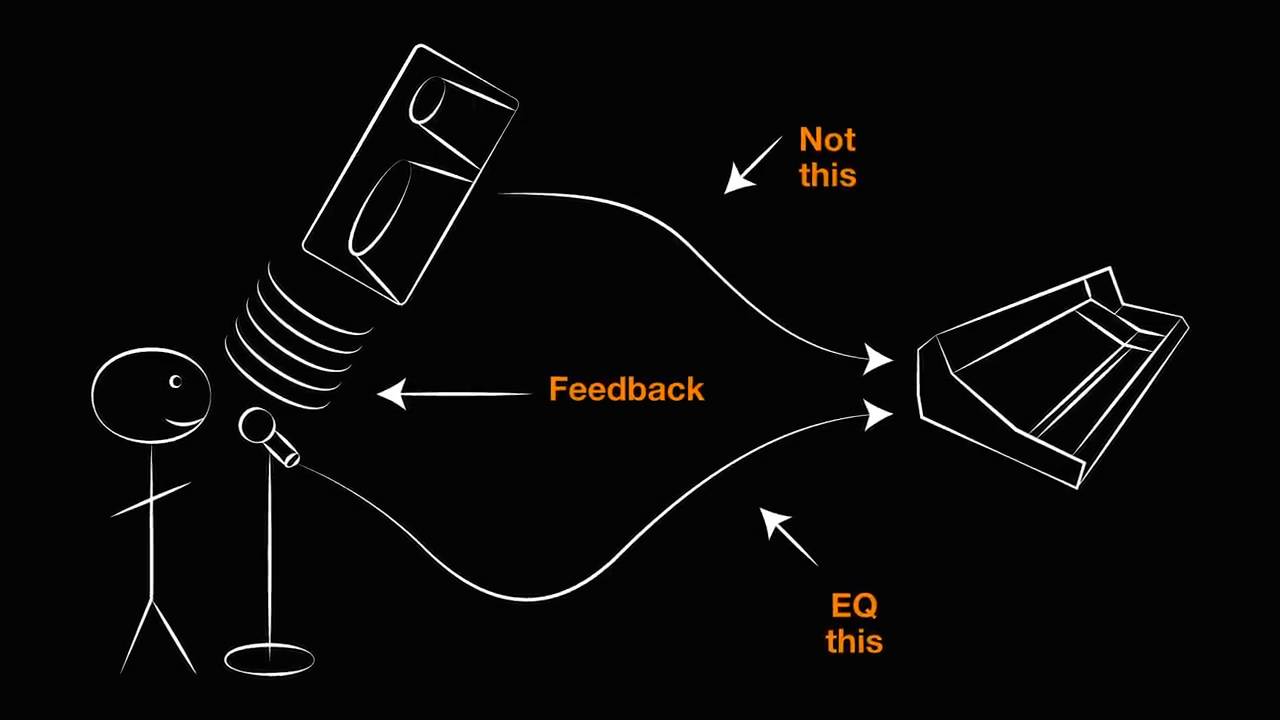
Some people have seen my livestream video where I have rung out feedback on choir microphones right there live for you. The question is, “Where do you put that EQ?” And the answer is that I start with the EQ on the individual channels. But if I run out of EQ bands there, then I might group those together and put an EQ on the group to make additional cuts that were on all of the channels when they combined.
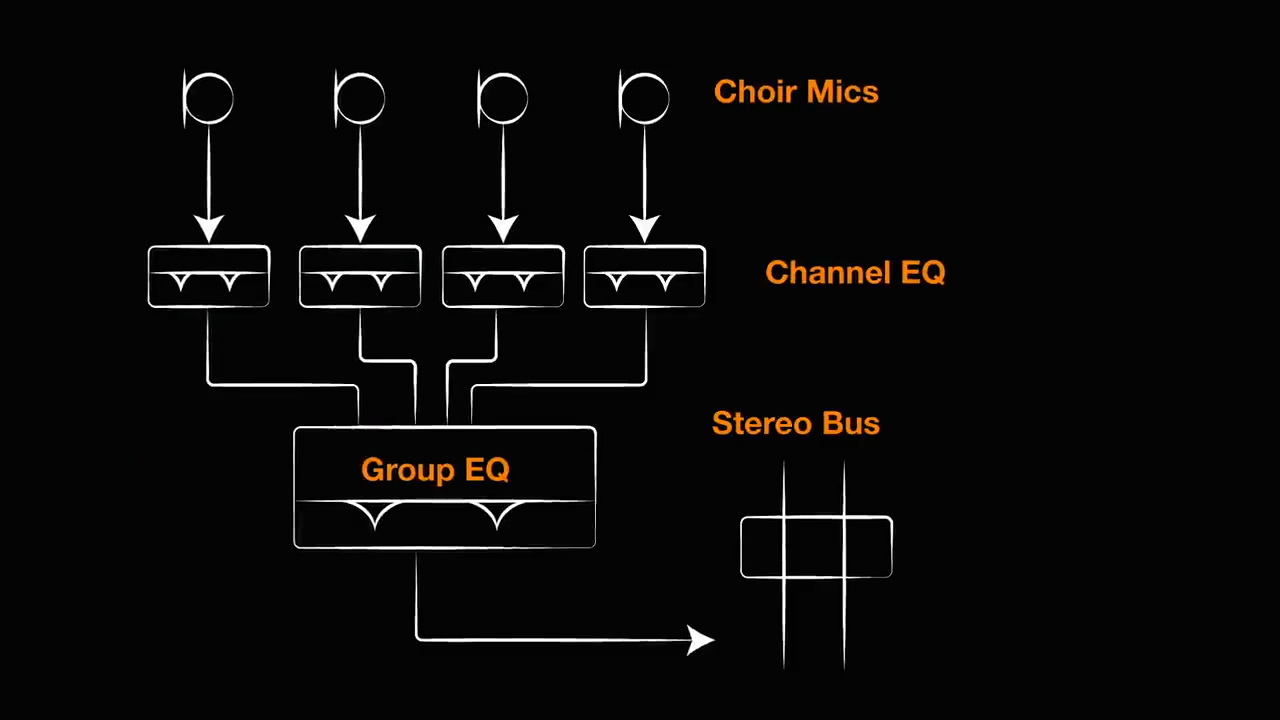
The other question I get is, “If you're using all your EQ bands to take care of feedback, how do you take care of the tone of the microphones?” Hopefully on a choir you've chosen a mic that sounds good in the first place and you don't have to do a lot of tone shaping. The placement and the sound of the source has to be your tone control in that situation.
Graphic EQ - Why Do I Hate it So Much?
Now let's talk about my nemesis: graphic EQ. I hate it. And I didn't used to hate it, but now that I dove a little bit deeper, I hate it. And I get it, it used to be the only option that we had. But now that we have parametric EQ, reach for that first. And let me show you why. Check out this clip from my Worship Sound Wisdom course.
Make Small Changes and Trust Your Ears
As a parting note, I want to remind you to make small changes at a time when you're EQing your system and always A-B it to check to make sure that you're really helping something, not hurting it. Don't forget to listen to music as your final check and trust your ears more than you trust the gear. Sometimes you can just pick up on stuff that you can't see on a screen. If you're passionate about making your church sound the very best that it can, I wrote a free guide for you called How to Lead Your Church Sound Team. You can find it at the bottom of this post, and I think it'll really help you dial in exactly what it's going to mean for your team to have winning sound at your church.
Remember: it's all about the low end, avoid the sound tech solo, and nobody leaves church humming the kick drum. We'll see you back here next time on Attaway Audio.
Lead your sound team with clarity!
Sign up for your FREE guide - How to Lead Your Church Sound Team. Clarify the vision for your team, build your team, and create a clear path toward making every worship mix enjoyable.
We hate SPAM. We will never sell your information, for any reason.

